Your first workflow
A workflow is a reusable blueprint: a tree of prompt steps the engine runs in order, feeding each step's output into the next. This is where the core idea lives - break the hunt into small, focused tasks instead of one giant prompt.
Before you start
Create a workflow
Open Workflows → New workflow. You can start with a blank workflow, duplicate an existing workflow, or choose Generate with AI.
Generate a draft with AI
Describe the security research process you want, including:
- the objective and any important exclusions,
- the stages and their order,
- what each stage should produce,
- where work should fan out into sibling steps, and
- any values a scan user should supply through
extravariables.
Then select a configured provider, model, thinking effort, and harness. The engine generates and validates a complete draft before opening it in the normal workflow builder. Review the names, prompts, variables, depth behavior, and output schemas, then save it explicitly. Generation never creates a workflow automatically.
Build one manually
Choose Blank workflow, give it a name and a short description, then start adding steps.
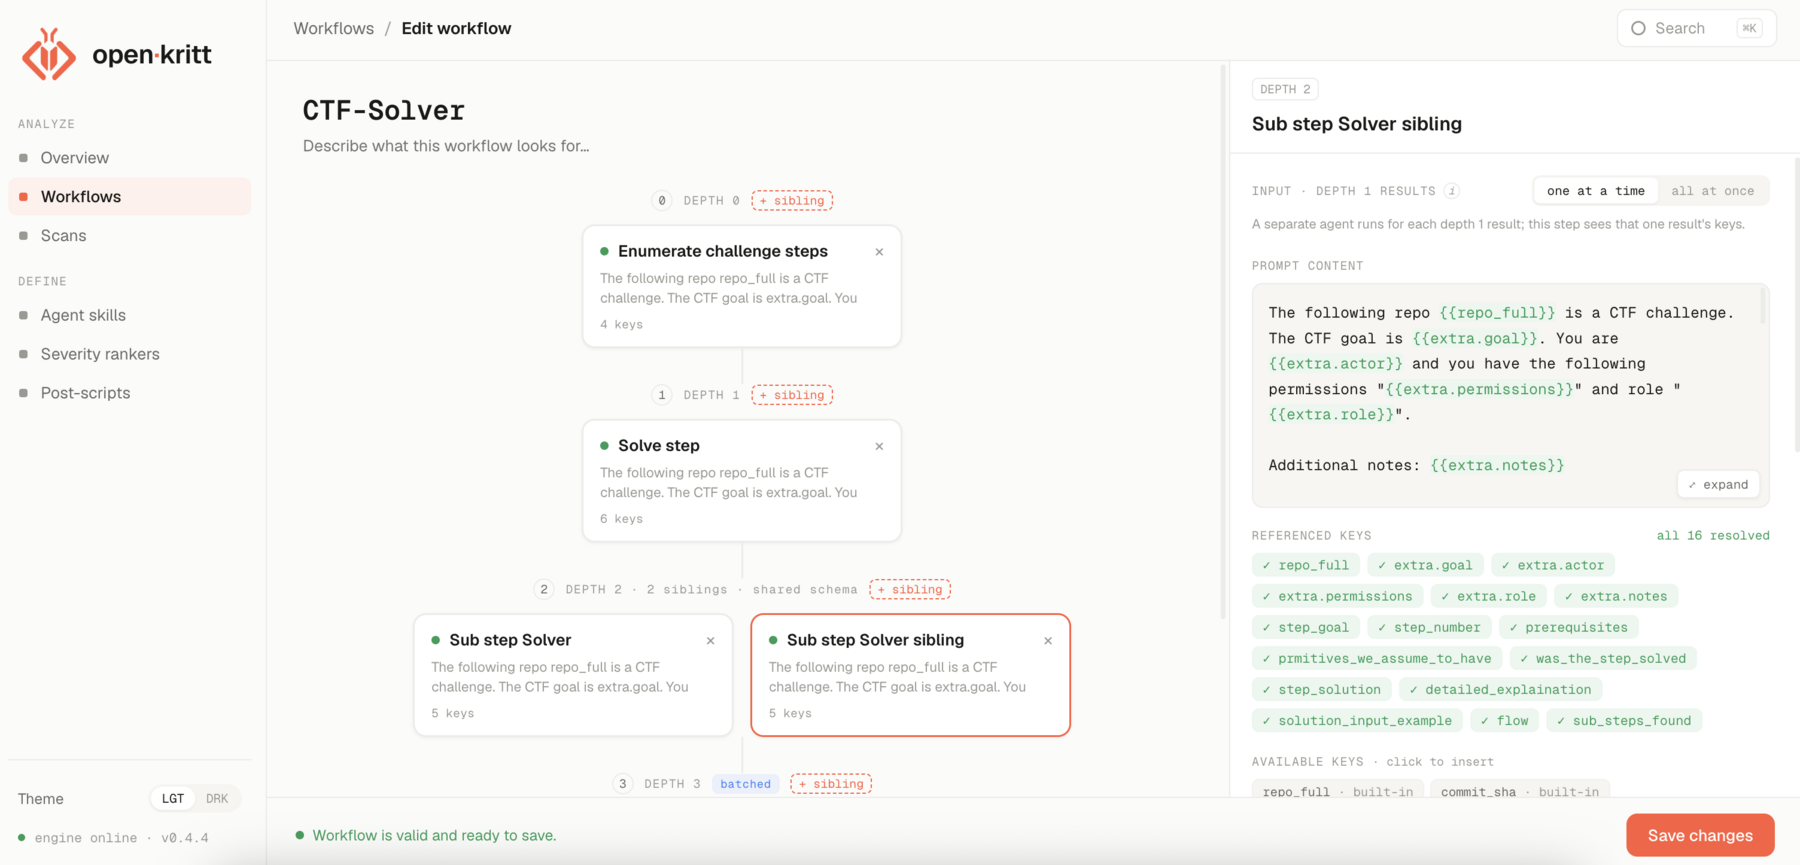
Each step has two parts:
- Prompt content - the instruction you send to the agent, with
{{variable}}placeholders. - Output schema - the keys this step must emit and their types (
string,number,boolean,array,object).
Structure it by depth
Steps are organized into depths. Depth 0 is the entry point and runs once. Each deeper level runs on the results produced above it.
A minimal two-level shape looks like this:
- Depth 0 - Enumerate. Ask the agent to list candidate entry points (e.g. every HTTP route). Mark it multi-output so it can emit many results.
- Depth 1 - Analyze. For each entry point from depth 0, ask a focused question about
that one target. It can reference depth-0 keys directly, like
{{entrypoint}}.
The final (deepest) step is special: it must emit the fixed finding schema so results are consistent and comparable. The builder highlights this for you and won't let you save until the terminal step declares every required key.
Save it
When the banner reads "Workflow is valid and ready to save," hit Save changes. Your workflow is now a reusable blueprint any scan can point at.
Next, add a post-script to follow up on each finding.